
Microsoft CA can now issue certificates signed by Quantum-Resistant ECDSA Algorithm: Part 2 - Configure CA to select a custom Crypto Provider
Article in the Series
This article is part of a series. The other articles are:
- Microsoft CA can now issue certificates signed by Quantum-Resistant ECDSA Algorithm: Part 1 - Installing ADCS
- Microsoft CA can now issue certificates signed by Quantum-Resistant ECDSA Algorithm: Part 3 - Submitting CSR to CA
- Microsoft CA can now issue certificates signed by Quantum-Resistant ECDSA Algorithm: Part 4 - Issuing certificate signed with custom Crypto Provider
- Microsoft CA can now issue certificates signed by Quantum-Resistant ECDSA Algorithm: Bonus Part - Are signatures ECDSA compliant?
Introduction
Recall in the earlier Part 1 article, we learnt about the ADCS roles, Certificate Authority (CA) and Certificate Authority Web Enrollment. CA Web Enrollment allows the submission of CSR to the CA server through a web browser interface while CA manages certificate issuance and revocation. Part 1 has demonstrated the installation of these ADCS roles.
In this article, I will be going through the configuration steps of these ADCS roles. Most importantly, I will demonstrate how CA can be configured to select pQCee Cryptographic Provider, which supports CA's signing operations by providing an additional quantum-resistant SPP layer with ECDSA as the signing algorithm.
For demonstration purpose, I will only be going through with 1 specific type of CA, a Standalone Root CA.
Pre-Configuration:
Ensure that you have registered pQCee Cryptographic Provider on the Windows Server.
After registering, run certutil -csplist to display the available list of cryptographic service providers (CSPs) on the Windows Server. As shown from the image below, pQCee Cryptographic Provider is found at the end of the image, suggesting that it is a registered provider.
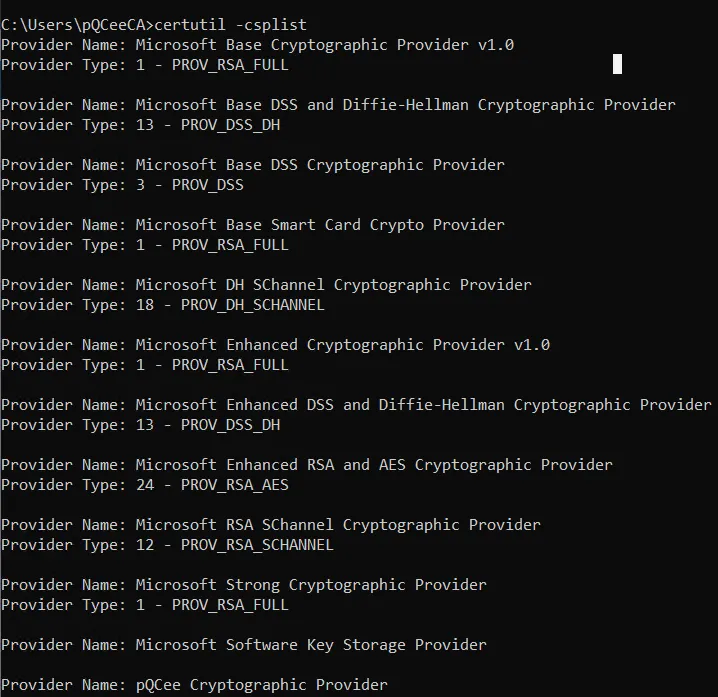
By registering pQCee Cryptographic Provider, CA will then be able to recognise pQCee Cryptographic Provider as one of the providers CA can select to support the CA's signing operations.
Configure a Standalone Root CA to select pQCee Cryptographic Provider as the cryptographic provider
This section covers the configuration of ADCS roles. During one of the configuration steps, you will be prompted to select a cryptographic provider which will support the CA in signing operations by providing the digital signing algorithm. Select pQCee Cryptographic Provider.
The image below shows the start of the ADCS configuration pop-up wizard
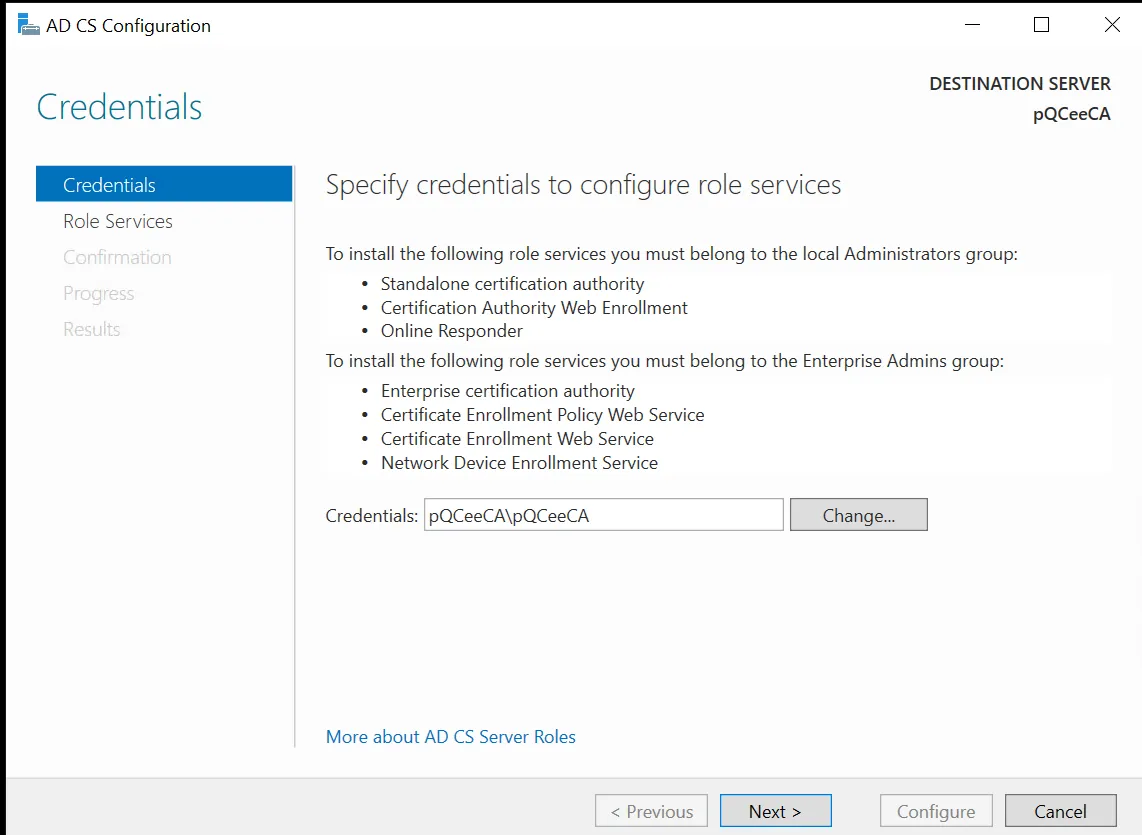
Specify your credentials. This means to choose an account with the user rights on the Windows Server. Otherwise, if there is only one account, ADCS will choose that account by default. Click "Next >" to select the roles to configure.
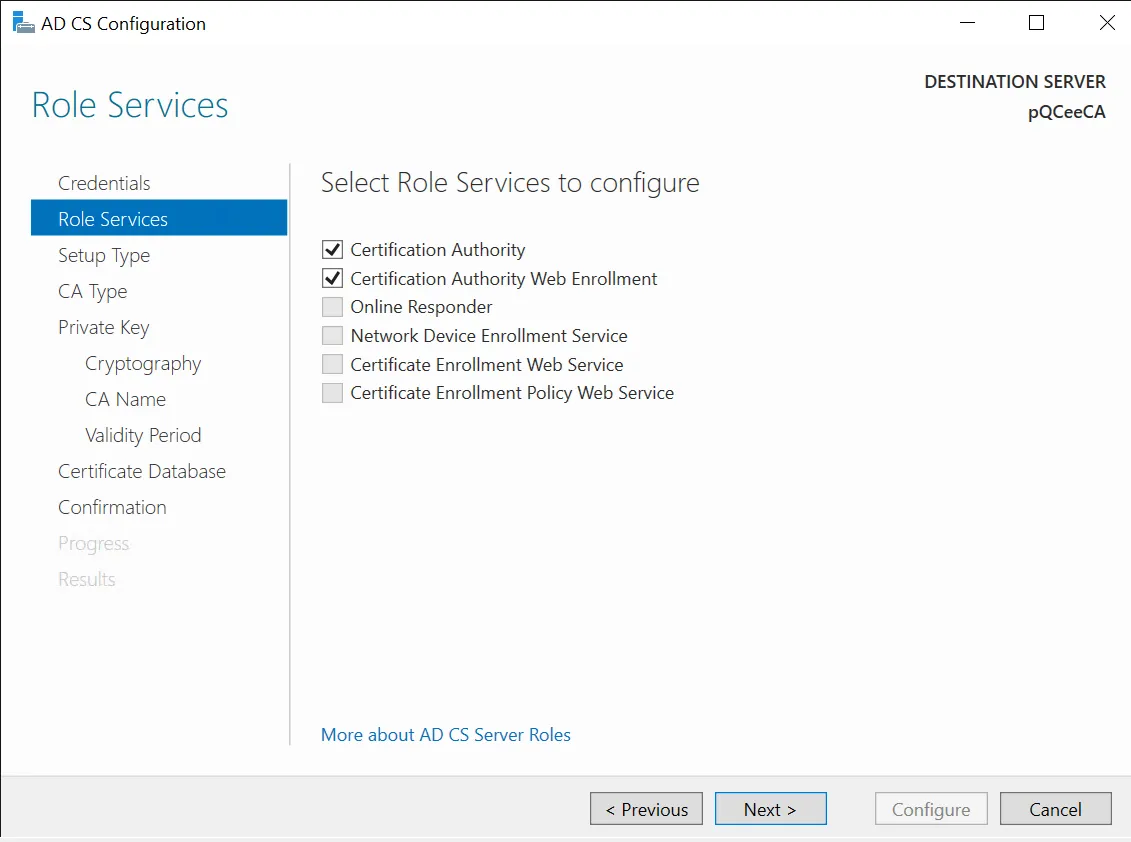
Select both the roles that were installed and click "Next >". You will be prompted to select the setup types of CA.
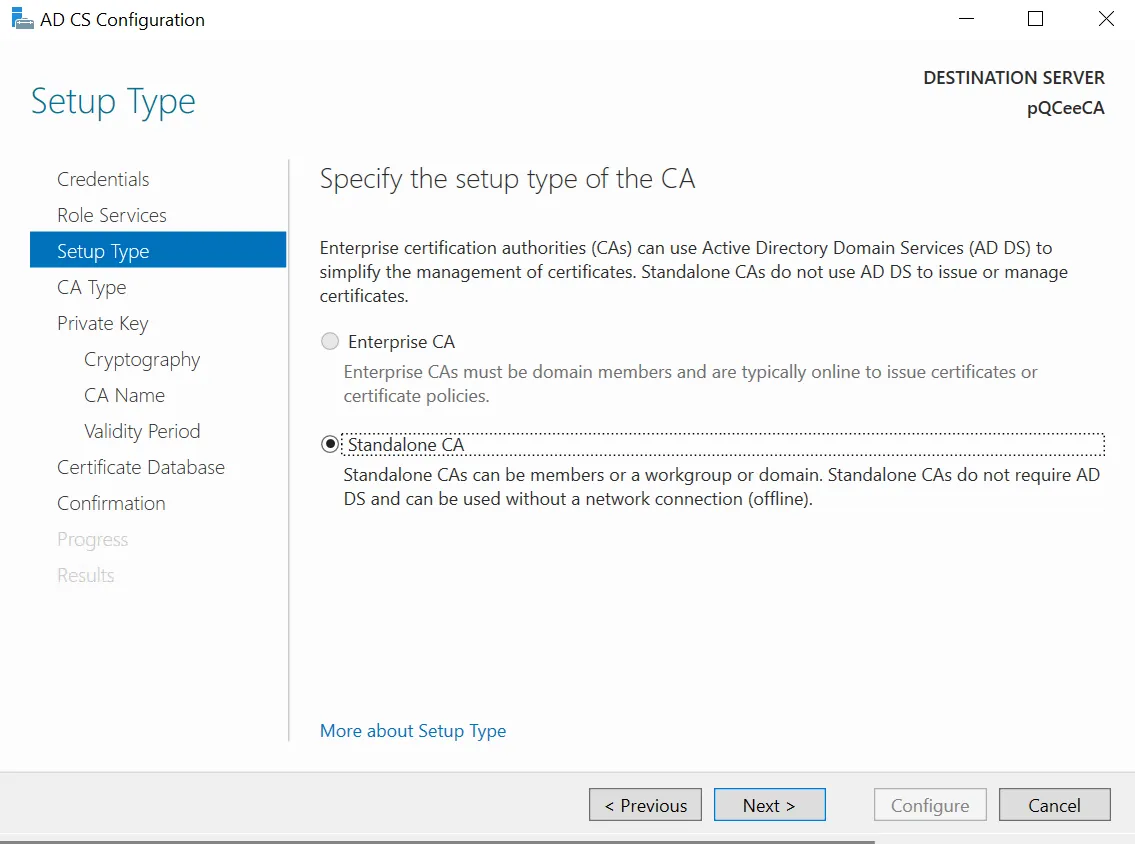
Select "Standalone CA" and click "Next >". You will be prompted to choose the CA Type.
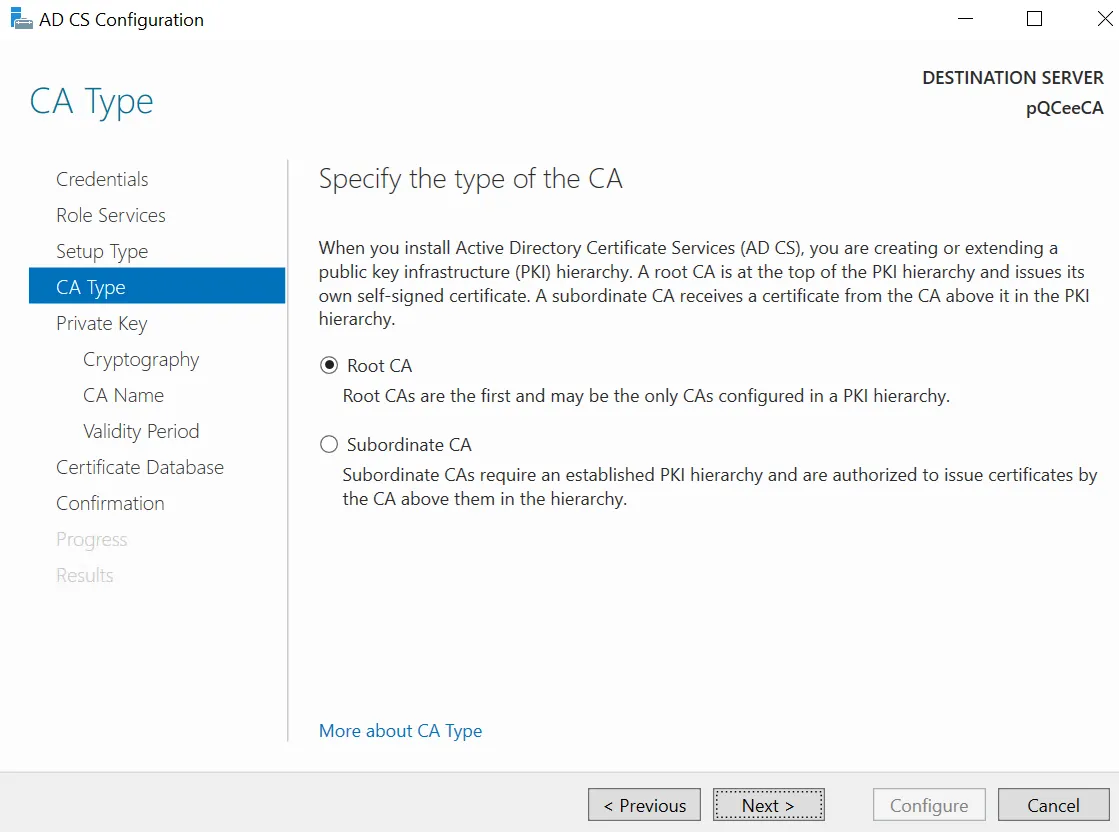
Select "Root CA". Click "Next >".
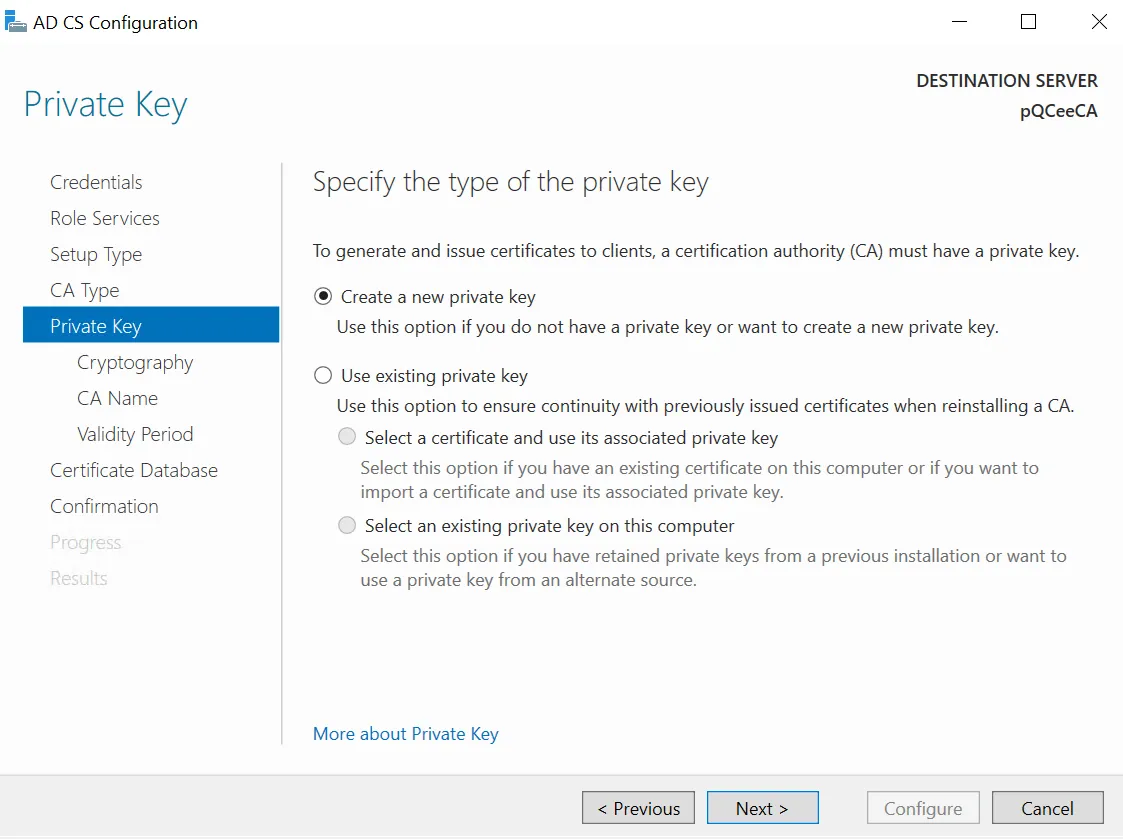
Create an entirely new private key. Select "Create a new private key". Click "Next >".
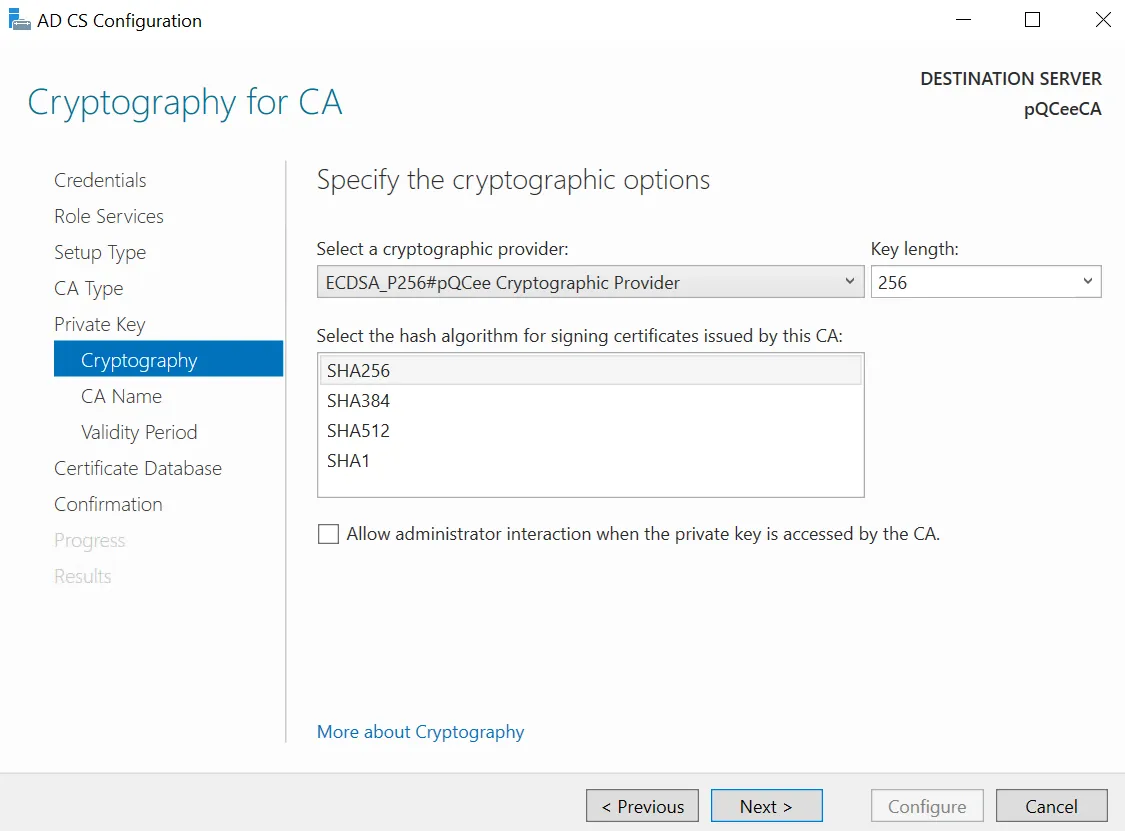
Select "ECDSA_P256#pQCee Cryptographic Provider" as the cryptographic provider. Select "256" as the key length and "SHA256" as the hash algorithm. Click "Next >" to choose the CA's name.
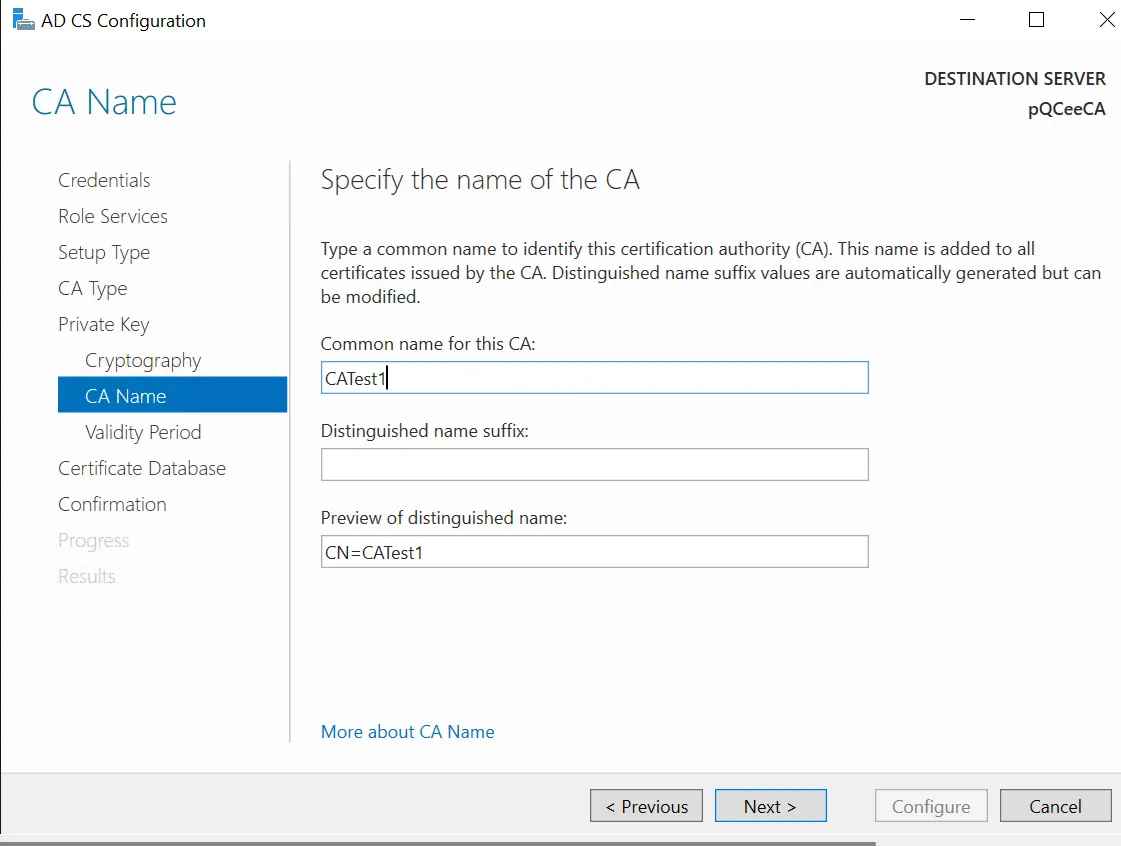
Choose a common name for the CA and click "Next >". You will be prompted to specify the validity period of the certificates generated by the CA.
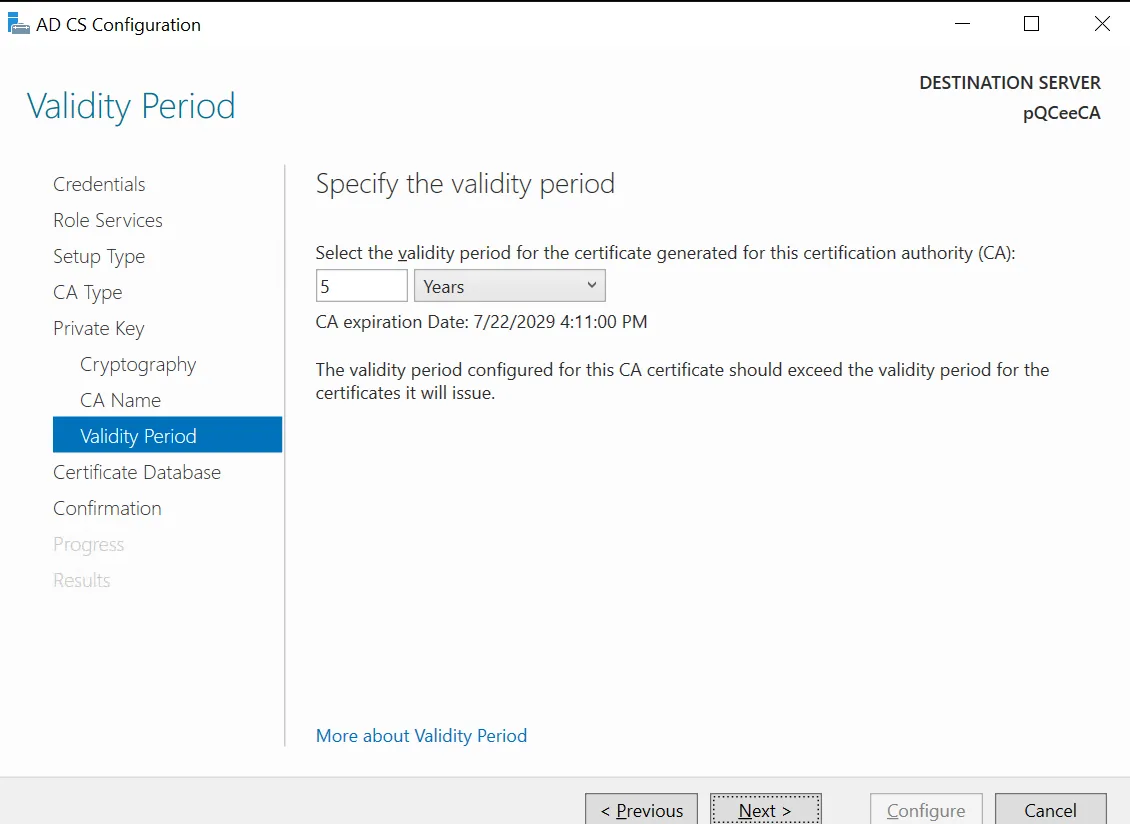
Choose a validity period. The default is 5 years. Click "Next >".
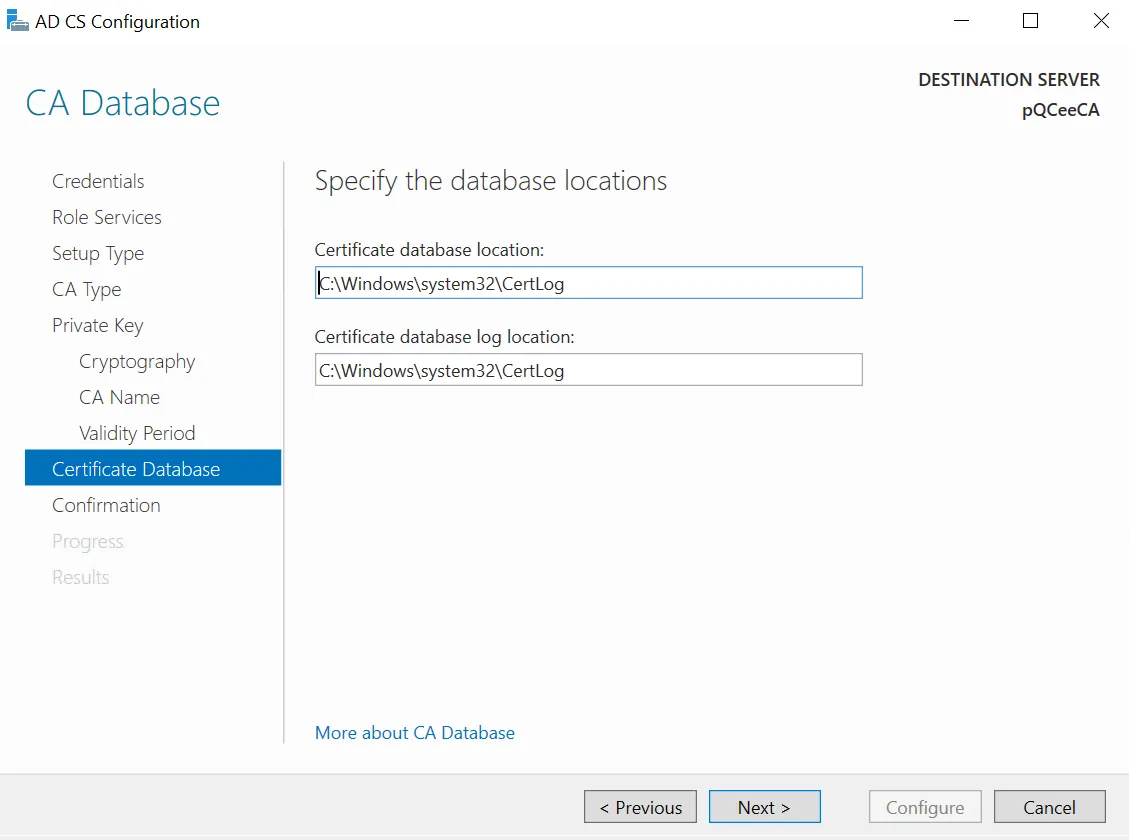
Choose a database. Otherwise, CA will select a default path (shown in the image). Click "Next >".
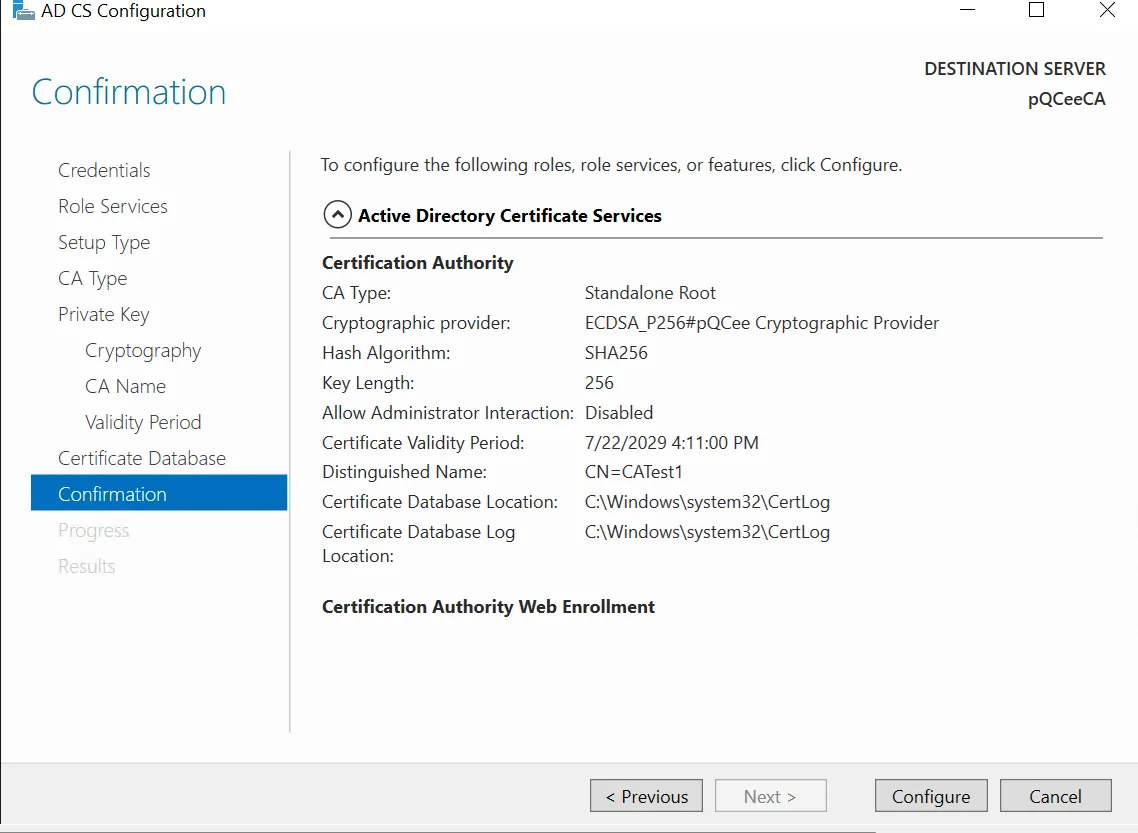
After you have confirmed that the details are correct, click on "Configure".
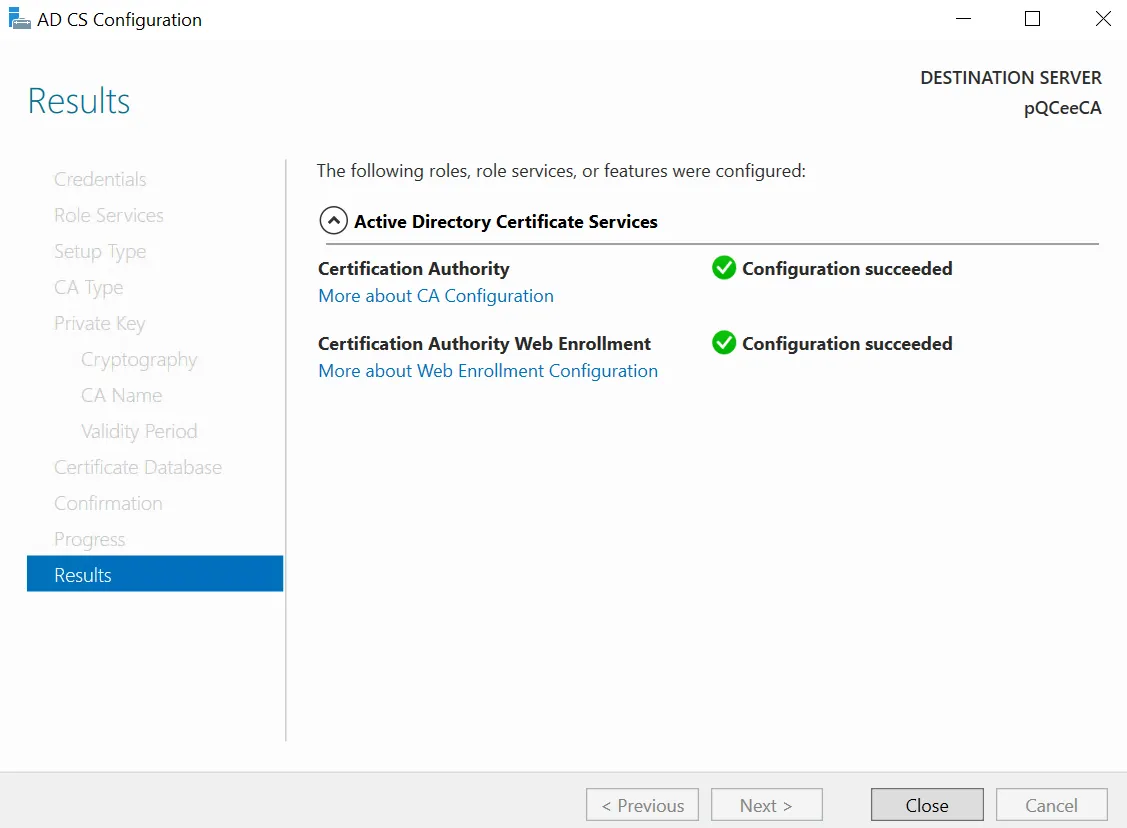
You should see "Configuration succeeded" for each of the roles you selected to install and configure.
Post-Configuration
After configuration, go to the Windows search bar and search and open the "Certificate Authority" application. This is the application that will manage certificate issuance and revocation.
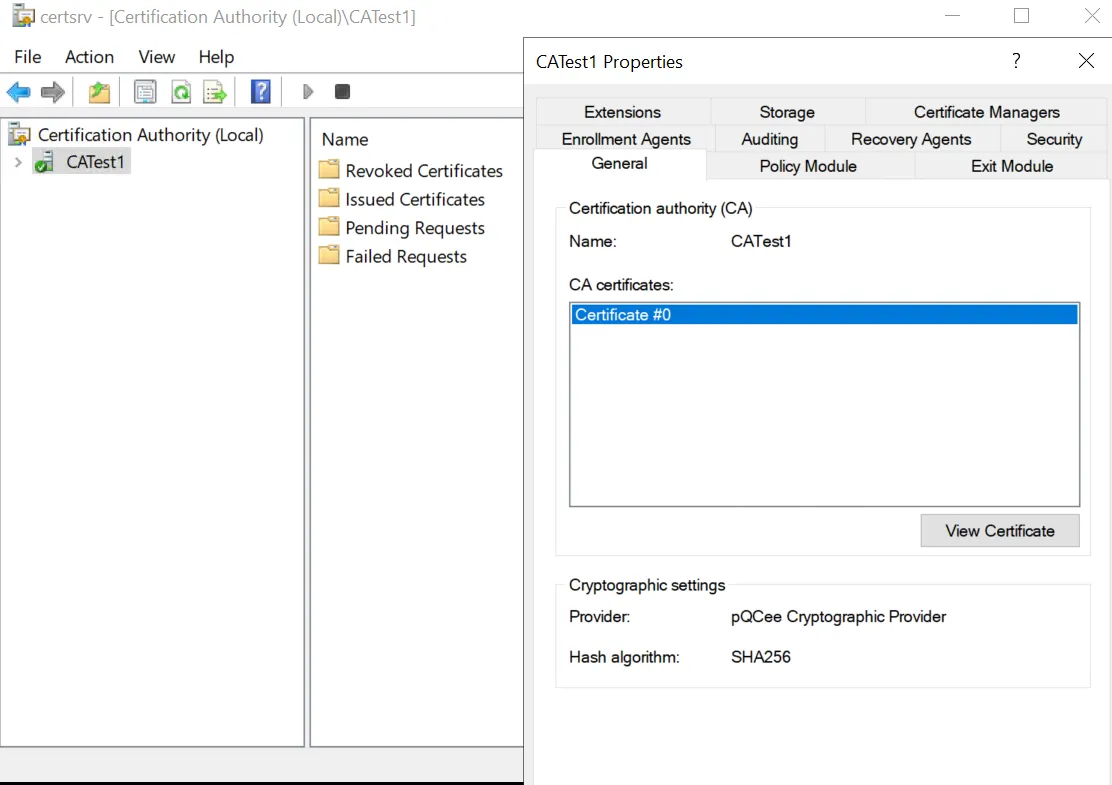
Right click on the common name of the CA and select "Properties". You should see a pop-up wizard that shows the CA's properties. Under the "General" tab, at the bottom, you should see that the "Provider" is "pQCee Cryptographic Provider".
You have now configured a Standalone Root CA to select pQCee Cryptographic Provider as the provider which will provide the quantum-resistant SPP layer with ECDSA as the signing algorithm for CA's signing operations.
Conclusion
In Part 2, we learnt the configuration steps and how CA can select pQCee Cryptographic Provider. At this point, CA will rely on pQCee Cryptographic Provider for any signing operations.
In Part 3 of the series, I will show how to submit a Certificate Signing Request (CSR) as a client to the CA server. In Part 4 of the series, I will show how to approve that CSR and issue the signed certificate as a CA's server administrator. This is to demonstrate that the CA can issue signed certificates with the support of pQCee Cryptographic Provider to provide the signing algorithm (SPP layer + ECDSA).
Author
Cher Yue Yang
Yue Yang is an intern in pQCee. He marvels at how the cybersecurity landscape is shifting to a post-quantum era in the near future. He is excited to be part of the post-quantum movement before he begins his Computer Science degree.